
Flax (Linum usitatissimum) is a versatile plant known for its fibers, seeds, and oil. Its usage spans various industries, from textiles to nutrition, and even building materials. Recently, flax fiber has become popular in construction and home design due to its sustainability and insulation properties. This article focuses on installing flax, specifically flax-based building products and insulation materials. We will explore its benefits, preparation process, tools required, step-by-step installation, and long-term maintenance.
Introduction to Flax and Its Uses
Flax, historically used for linen production, has gained recognition for its eco-friendly properties. It’s a biodegradable, natural material with applications in sustainable construction, interior design, and insulation. Flax insulation, for example, has been lauded for its high thermal performance, acoustic control, and eco-friendly properties.
Benefits of Flax in Construction
- Thermal Efficiency: Flax has impressive insulating properties, which help regulate indoor temperatures. It provides warmth during cold seasons and keeps interiors cool in the heat.
- Moisture Control: Flax can absorb and release moisture, improving air quality and reducing the risk of mold and mildew formation.
- Sustainability: It is a renewable resource, growing annually and biodegrading easily. This makes it an ideal material for green building projects.
- Sound Insulation: Flax absorbs sound effectively, reducing noise pollution and improving the acoustic environment inside homes and buildings.
Types of Flax-Based Products
There are several types of flax products available for use in construction:
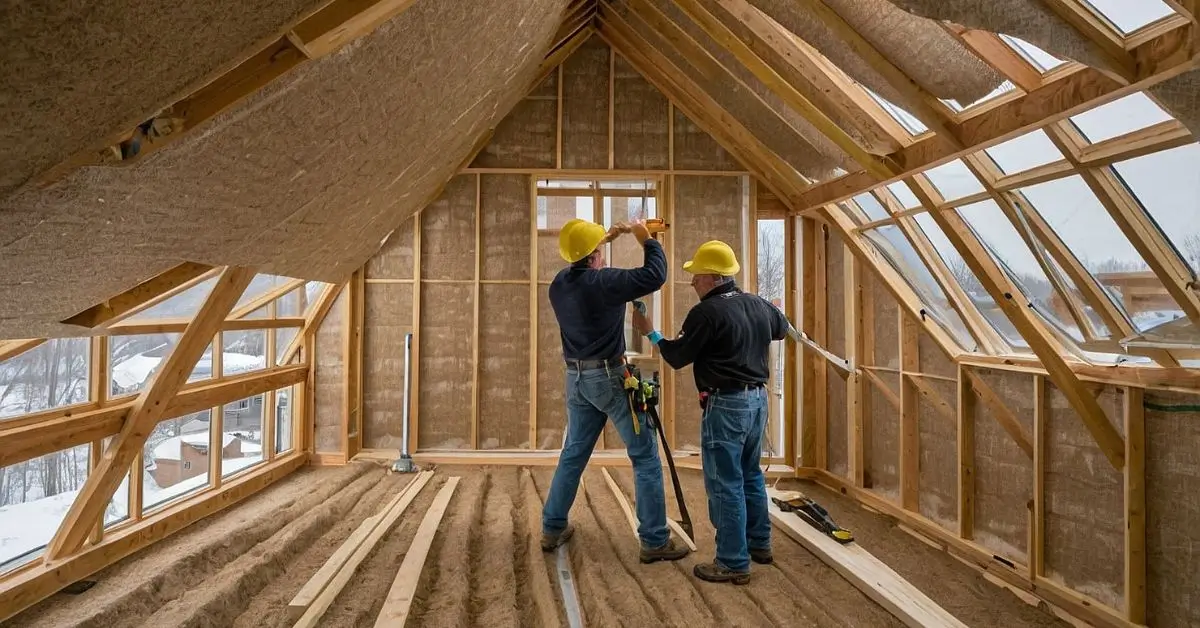
- Flax Insulation: Typically available in batts or rolls, flax insulation is installed between studs in walls or on roof panels to provide thermal protection.
- Flax Fiber Panels: These panels can be used for walls and partitions, offering a natural alternative to conventional materials like gypsum.
- Flax-Based Flooring: While less common, flax can be processed into resilient flooring materials that add both aesthetics and insulation to interior spaces.
Tools and Materials Needed for Flax Installation
Before embarking on the installation of flax-based materials, gather the following tools:
- Measuring tape: For accurately sizing flax batts or panels.
- Utility knife: To cut insulation batts or panels to size.
- Staple gun or insulation fasteners: To secure the insulation or panels in place.
- Protective gear: Gloves, safety goggles, and a dust mask to prevent skin and respiratory irritation.
- Sealant or tape: To ensure airtight seals around insulation.
Preparing for Flax Installation
Inspecting the Area
Before installing flax insulation or other materials, assess the area where the product will be installed. This can be a wall cavity, attic, or floor. Look for any signs of moisture, mold, or structural issues. Address these issues before proceeding to ensure that your flax installation lasts and performs as expected.
Measuring and Cutting
Once the space is prepped, use a measuring tape to measure the dimensions of the cavity or space where the flax insulation or panels will be installed. Cut the material to size using a utility knife or insulation cutter. It’s essential to make precise cuts to avoid gaps that could reduce the insulation’s efficiency.
Step-by-Step Guide to Installing Flax Insulation
Safety First
Put on protective gear, including gloves, goggles, and a dust mask. Flax is a natural material, but the fibers can irritate the skin, eyes, and lungs when handled.
Installing Flax Batts in Walls
- Step 1: Fit the Batts: After cutting the insulation to fit the wall cavity, push the flax batts into the cavity between the studs. Be sure the batt fits snugly, with no gaps around the edges.
- Step 2: Secure the Insulation: Use a staple gun to secure the edges of the flax batt to the wall studs. This will hold the insulation in place.
- Step 3: Seal the Gaps: Check for any small gaps between the batts and the studs. Use a sealant or insulation tape to close any gaps to ensure maximum thermal performance.
Installing Flax Insulation in Attics
- Step 1: Lay Out the Insulation: Roll out flax insulation across the attic floor, covering the entire surface area.
- Step 2: Layer the Insulation: In colder climates, you may need to install multiple layers of insulation to achieve optimal thermal protection. Ensure there are no gaps or overlaps between layers.
- Step 3: Secure Edges: Use insulation fasteners or staples to hold the insulation in place, particularly along the edges and corners.
Installing Flax Panels
Flax fiber panels can be installed similarly to gypsum board for walls.
- Step 1: Prepare the Wall Surface: Ensure that the wall studs or structure where the panel will be installed is clean and free of debris.
- Step 2: Attach the Panel: Line up the flax fiber panel with the wall studs and use screws or nails to secure it in place.
- Step 3: Seal Joints: Once the panel is installed, seal the joints between panels with joint tape and filler to create a smooth, finished look.
Flax Flooring Installation
Though less common, flax can be used as a base for natural flooring materials like linoleum. The process of installing flax flooring involves:
- Step 1: Prepare the Subfloor: Make sure the subfloor is clean, level, and dry.
- Step 2: Lay the Flooring: Unroll the flax-based flooring and cut it to fit the room’s dimensions.
- Step 3: Secure the Flooring: Use adhesive to attach the flax flooring to the subfloor. Smooth it out to avoid air pockets or wrinkles.
- Step 4: Finish Edges: Trim excess material and use edging strips to ensure the flooring is securely in place and aesthetically pleasing.
Long-Term Maintenance of Flax Products
Flax-based products require minimal maintenance but benefit from periodic inspections to ensure they are performing well. Here’s how to care for your flax insulation or panels:
Inspect for Moisture
Regularly check your insulation and panels for signs of moisture or condensation. Flax can absorb moisture, but prolonged exposure to dampness can reduce its effectiveness and lead to mold growth.
Check for Settling
Over time, flax insulation may settle, particularly in wall cavities. Inspect your insulation every few years and add more insulation if necessary to maintain its performance.
Keep Pests at Bay
While flax insulation is less likely to attract pests than some other materials, it’s still wise to keep an eye out for any signs of insect or rodent activity. Address any pest issues promptly to prevent damage to your insulation.
The Future of Flax in Construction
As sustainability becomes a more significant focus in the construction industry, flax is expected to play an increasing role in green building practices. Its natural, renewable nature, coupled with its insulating and acoustic properties, make it a valuable material in modern construction. Innovations in processing flax fibers are likely to expand its uses in the coming years, from improved insulation products to flax-based composites for structural applications.
Conclusion
Installing flax-based products, whether insulation or fiber panels, is a straightforward process that offers numerous benefits, from improved thermal and acoustic performance to environmental sustainability. By following the steps outlined above and maintaining the installed materials, you can enjoy the long-term advantages of flax in your home or building.
The future of flax in the construction industry looks bright, with innovations continuously emerging that will expand its applications. As more builders and homeowners seek sustainable alternatives, flax offers an eco-friendly, efficient, and versatile solution that meets the demands of modern living.