
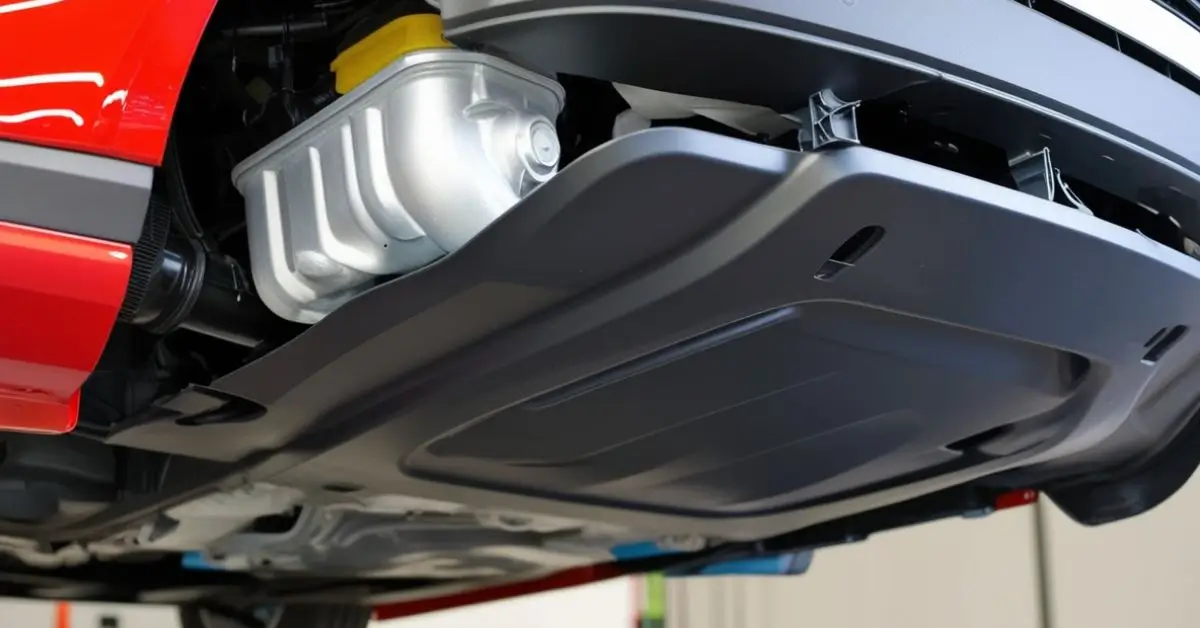
The plastic underbody of a car, often referred to as the engine splash shield, serves a critical role in protecting the vehicle’s components from debris, water, and dirt. Whether you need to access the engine, perform routine maintenance, or replace the shield due to wear and tear, removing this panel is an essential skill for any car owner or DIY enthusiast.
This guide offers a step-by-step breakdown of how to safely and efficiently remove the plastic underbody cover while providing tips to avoid common pitfalls.
Why Remove the Plastic Underbody Cover?
Understanding why you might need to remove this cover is crucial. Here are the most common reasons:
- Routine Maintenance
Accessing the oil pan or other parts of the engine often requires removing the splash shield. - Damage Repair
Over time, the shield may crack or wear out due to road conditions or impacts. - Inspection or Cleaning
Removing the panel allows you to check for debris or leaks underneath the car.
Tools and Materials Needed
Before you begin, gather the following tools to make the process smooth and safe:
- Flathead Screwdriver: For prying off clips.
- Phillips Head Screwdriver: For removing screws.
- Socket Wrench Set: To handle bolts of various sizes.
- Plastic Fastener Removal Tool: Reduces the risk of damaging clips.
- Jack and Jack Stands: For lifting the car when needed.
- Safety Gloves: To protect your hands.
- Penetrating Lubricant: To loosen stubborn bolts or fasteners.
Safety Precautions
- Park Securely
Always park the car on a flat surface, engage the parking brake, and turn off the ignition. - Use Jack Stands
If you need to lift the vehicle, ensure it is stable by using jack stands. - Cool the Engine
Allow the engine to cool down to prevent burns while working underneath. - Disconnect the Battery
This is an extra precaution to avoid any accidental electrical issues.
Step-by-Step Process
1. Locate the Underbody Cover
Inspect the underside of the vehicle to identify the splash shield and its attachment points. These are typically found along the perimeter of the cover and may include:
- Screws
- Bolts
- Plastic clips
2. Raise the Vehicle (if needed)
If the car’s ground clearance is low, use a jack to lift the front of the vehicle. Secure it with jack stands for safety. Always ensure the car is stable before proceeding.
3. Remove Plastic Clips
Start by removing the plastic clips securing the cover. Use a flathead screwdriver or a plastic fastener removal tool:
- Insert the tool under the head of the clip.
- Gently pry upward to release the center pin.
- Remove the entire clip.
Tip: Be cautious to avoid breaking the clips, as they can often be reused.
4. Unscrew Bolts and Screws
Next, remove any screws or bolts holding the cover in place:
- Use a Phillips head screwdriver for screws.
- A socket wrench is typically required for bolts.
Keep all fasteners organized to ensure you don’t lose any during reinstallation.
5. Detach the Cover
With all fasteners removed, gently pull the cover away from the car. If it feels stuck, double-check for any missed fasteners. Avoid forcing the cover, as this could damage it or other components.
6. Inspect the Undercarriage
Once the cover is removed, take this opportunity to inspect the exposed undercarriage. Look for signs of:
- Dirt or debris accumulation
- Leaks or damage to components
- Rust or corrosion
Reinstallation Tips
After completing the required maintenance or repairs, reattach the cover by following these tips:
- Align the Cover
Position the splash shield carefully, ensuring it aligns with all the attachment points. - Secure Fasteners Properly
Reinstall screws, bolts, and clips in their original locations. Tighten them adequately but avoid overtightening, which could strip threads or damage the plastic. - Replace Damaged Parts
If any fasteners are broken, replace them with new ones to maintain the cover’s stability.
Troubleshooting Common Issues
- Stubborn Bolts or Clips
Apply penetrating lubricant to loosen rusted or stuck fasteners. Let it sit for a few minutes before attempting to remove them again. - Broken Fasteners
Keep extra clips and bolts on hand to replace any that break during removal. - Alignment Problems
Loosely attach all fasteners first to allow adjustments, then tighten them fully once the cover is properly aligned.
Comparison Chart: Plastic vs. Metal Underbody Covers
If you’re considering replacing your underbody cover, understanding the differences between plastic and metal options can help:
| Feature | Plastic Underbody Cover | Metal Underbody Cover |
|---|---|---|
| Durability | Prone to cracks or wear | Resistant to impacts |
| Weight | Lightweight | Heavier |
| Cost | Affordable | Expensive |
| Ease of Installation | Flexible and easier to handle | Requires more effort |
| Corrosion | No rust issues | May corrode over time |
Maintenance Tips for Longevity
- Regular Cleaning
Periodically clean the underbody cover and surrounding areas to prevent debris buildup. - Routine Inspections
Check for loose fasteners or cracks in the cover during routine maintenance. - Timely Repairs
Replace damaged covers or fasteners promptly to maintain protection for the undercarriage.
Benefits of Removing the Plastic Underbody Cover
Removing the splash shield may seem intimidating at first, but it offers significant advantages:
- Easier Maintenance
Accessing components like the oil pan or drain plug becomes straightforward. - Cost Savings
Performing tasks like oil changes yourself can save money compared to visiting a mechanic. - Knowledge of Your Vehicle
Familiarizing yourself with your car’s undercarriage builds confidence and understanding for future repairs.
Tips for Beginners
- Take Photos
Document the process with photos to ensure correct reinstallation. - Label Fasteners
Use labeled containers or a magnetic tray to organize screws, bolts, and clips. - Be Patient
Work methodically and avoid rushing to reduce the risk of errors or damage.
Conclusion
Removing the plastic underbody cover of a car is a manageable task that provides access to essential components for maintenance and inspection. By following the outlined steps, using the right tools, and taking appropriate precautions, you can complete this task confidently and safely.
Whether you’re addressing repairs, inspecting for damage, or cleaning the undercarriage, this skill will prove valuable for maintaining your vehicle’s performance and longevity.